This info was up on the net from about 2004 till about 2016 when Hartley lost his free web space. While doing some much needed clean up of my Morgan web page, I found this link was dead. I started searching for the files and the author. I found his email address and emailed him, asking if he still had his article and if he'd like me to post it again. He replied that he did have the file and would appreciated me reposting the article. So I have reformatted it and it's now back on line.
Thanks Hartley
Arranged and Formated for the SOL Morgan web page:
By: John T. Blair (WA4OHZ)
 Va. Beach, Va. 23464; (757) 495-8229
Created: Feb. 4, 2022
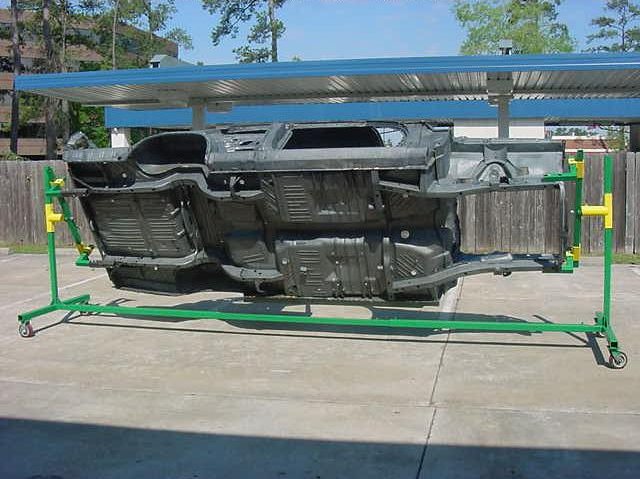
One of the most useful tools in the workshop for car restoration has to be a car body rotisserie. While this may look like a complicated and expensive gadget to build, it really is quite simple if you have a welder and a metal cut-off saw. The material for mine cost $250.00 including the bolts and paint. After you're finished using it, you can probably sell it for $500. - $1,000. Trying to do a good job on the underside of the car while laying on your back or crouched under a hoist makes things difficult. There's usually enough rot to replace and welding and hours of detailing to do that I call this unit a must. With the rotisserie, you can rotate the car so its underbelly is perpendicular to the ground. It was difficult to find the exact plans I wanted so I made mine from ideas I got from several pictures I found. When you make one, make sure your welds are strong and that you use only good quality bolts (no less than grade 5 to grade 8). This rotisserie was made to work for me. I do not certify any of this information for its engineering qualities and you are solely responsible for the use of these ideas and plans. The quality and safety of your rotisserie is based on the materials used, your welding skills and workmanship, and how safely you use the device. Once assembled, I was able to rotate the car with one hand. I used a 1/2 inch thumb screw welded onto the top of the outer rotator pipe to hold the rotation angle. For extra safety, drill a hole through one wall of the outer and inner round pipes and insert a 1/2 inch bolt for when the car is tilted vertically at 90 degrees.
Click here for complete free plans!
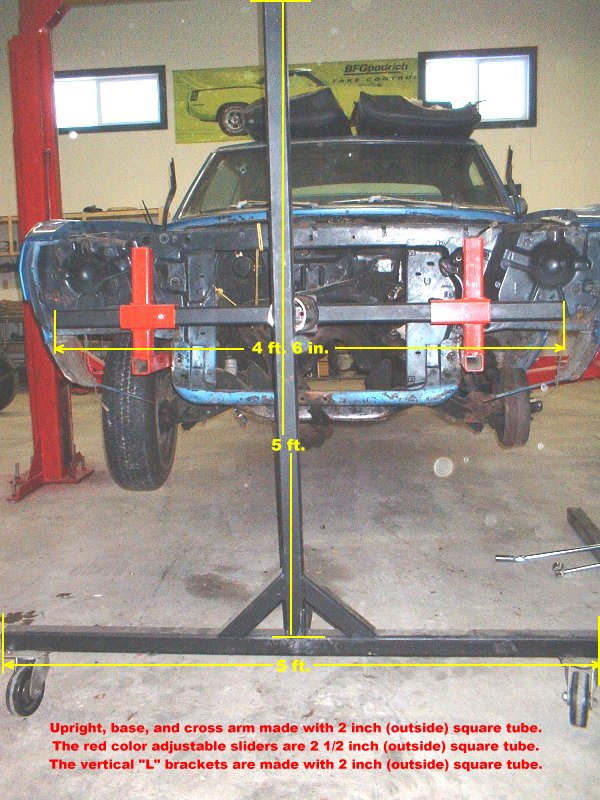


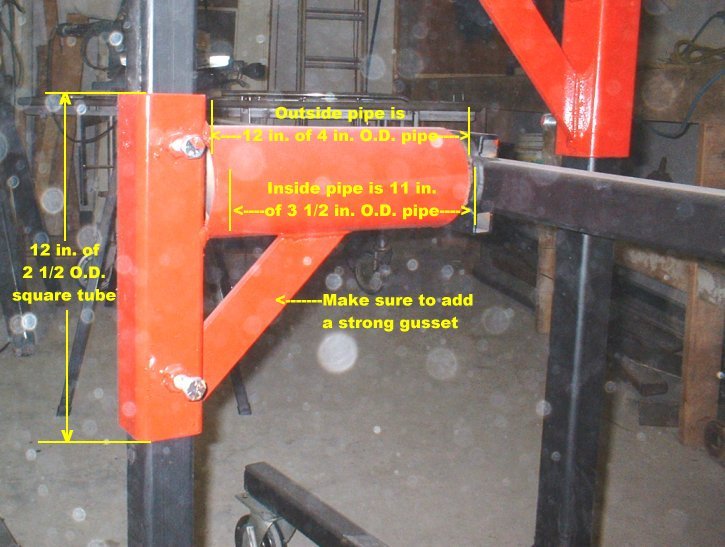
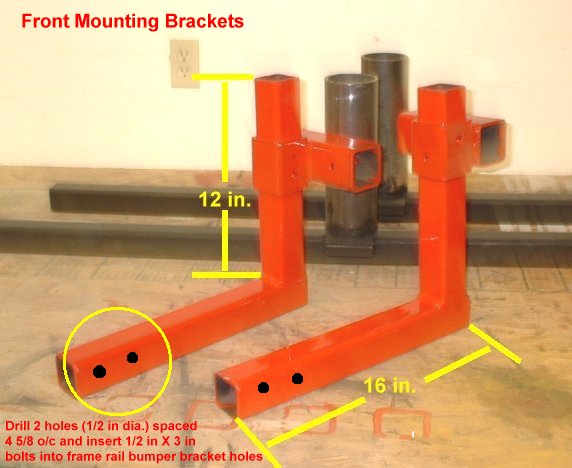
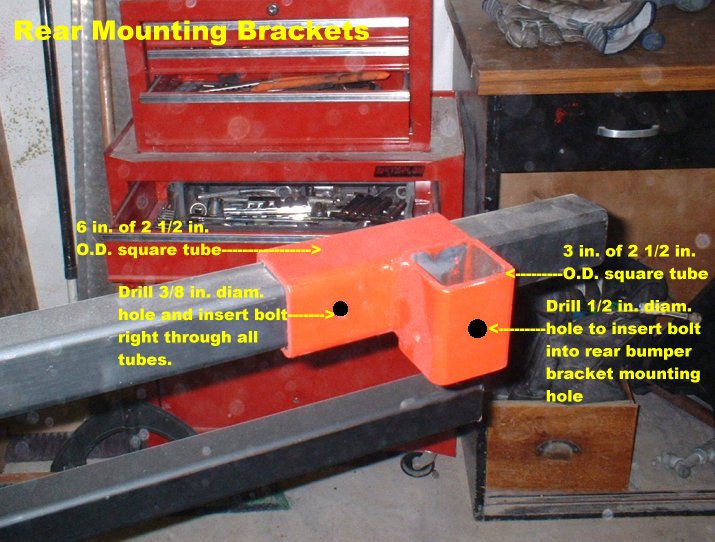
 Fig. 1
Fig. 2
Fig. 3
Fig. 4
Fig. 5
Fig. 6
Fig. 1
Fig. 2
Fig. 3
Fig. 4
Fig. 5
Fig. 6
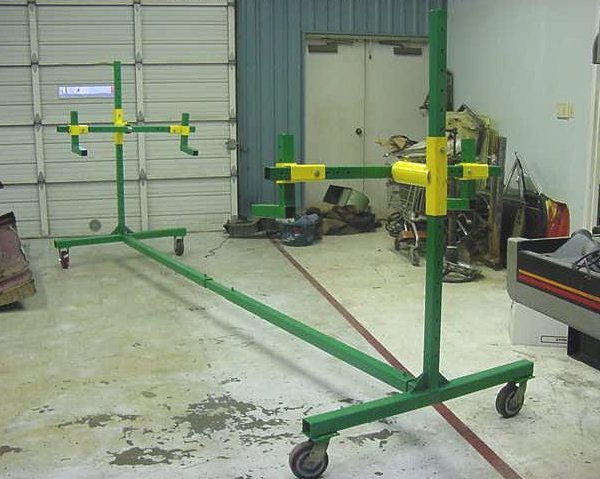
Start by assembling the two vertical uprights. Each upright is made from 2 in. O.D. square tube. Both the vertical upright and the bottom base piece are each 60 inches. Center the vertical upright onto the base tube and weld in place around all sides. Next, add 9 inch reinforcing gusset pieces on either side of the upright also made from 2 inch tube. Assemble two of these uprights (Fig. 1). On one upright base tube, weld on a 12 inch length of 2 inch tube and the second upright, weld on a 12 inch length of 2 1/2 inch tube onto the base arm as shown. This allows the two uprights to mate together for easy storage and transport (Fig. 2).ĀDrill a 3/8 inch hole through both sides of these short tubes 2 inches from the end. Make two cross arms 54 inches long using 2 inch tube. Weld the cross arm onto an 11 inch piece of 3 1/2 inch O.D. round pipe and add reinforcement scrap pieces to fill the void on the but end of the pipe where it attaches to the cross arm (Fig. 3). Next, make the adjustable rotator tube welding a 12 inch length of 4 inch O.D. round pipe onto the 2 1/2 inch square adjustable slider as pictured (Fig 4). Weld up one set of frame rail mounting brackets and drill one hole 1 1/2 inches from the end O.C. and another one 4 5/8 O.C. from the first hole. Later, you will insert a 1/2 inch X 3 inch long bolt through these holes into the front threaded frame rail holes (Fig 5). Next, weld up two sets of adjustable slider brackets that go onto the front and rear cross arms (Fig. 6).
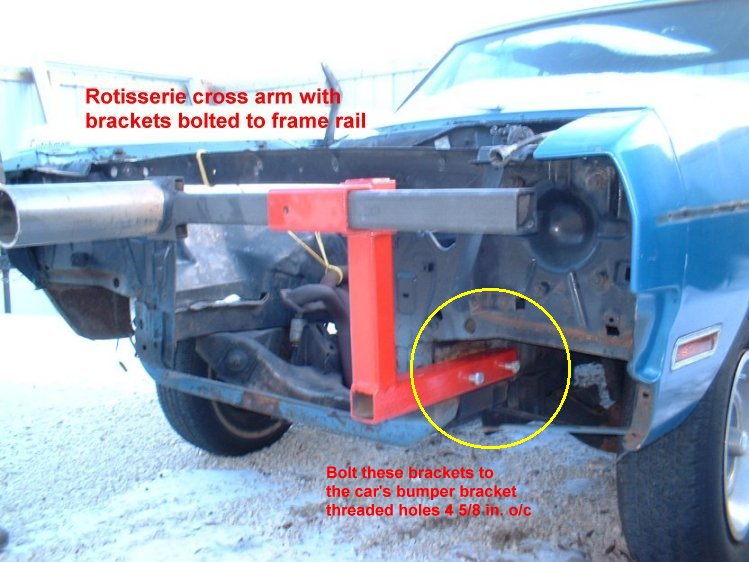
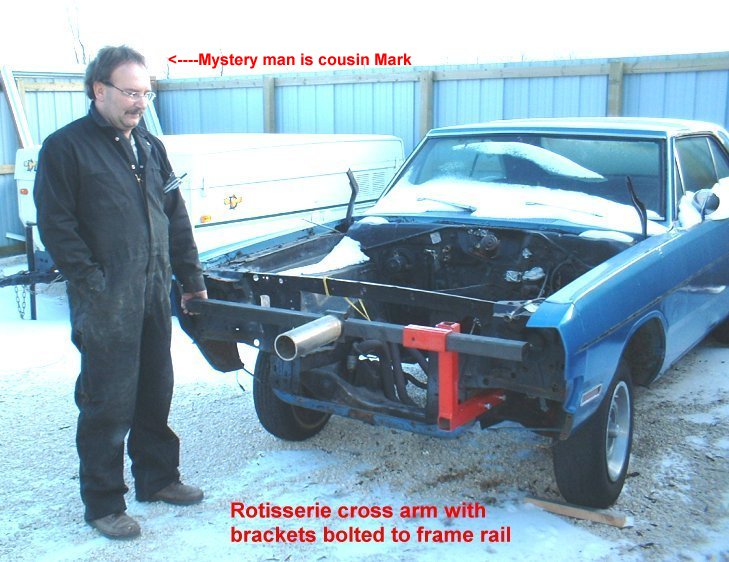
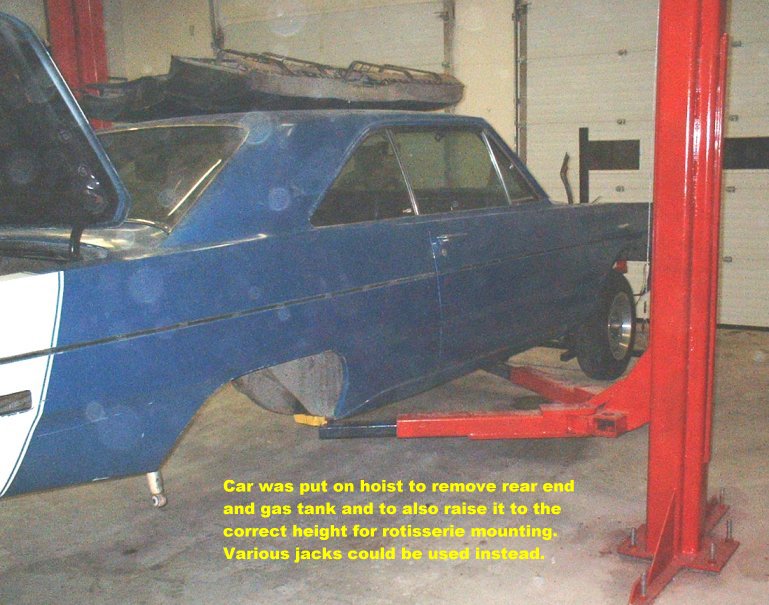
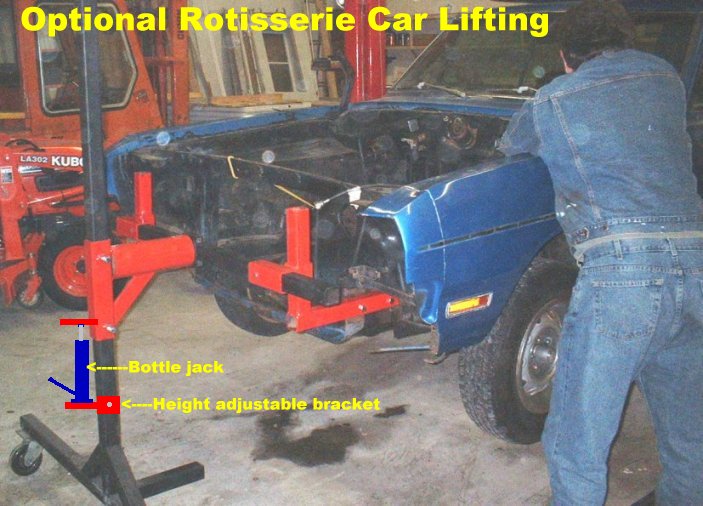
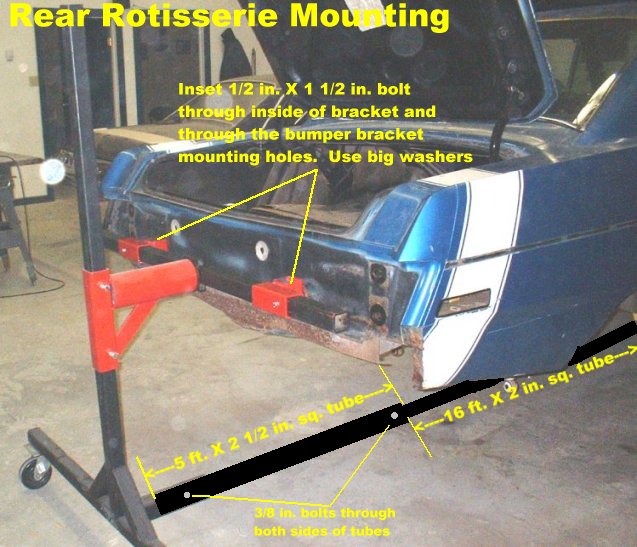
Fig. 7
Fig. 8
Fig. 9
Fig. 10
Fig. 11
Mount the two "L" brackets to the front frame rails (Fig. 7 & 8). After you remove the gas tank, rear end, and any other parts you decide to take off, the car can be raised to the required height for rotisserie mounting and rotation (Fig 9). If you don't have a hoist you can also simply use various jacking methods or weld up a sliding bracket and to mount a bottle jack to each upright to create the lift of the vertical slider sleeve (Fig. 10). The two uprights must be connected together with joined section of square tube to prevent them from separating (Fig. 11).
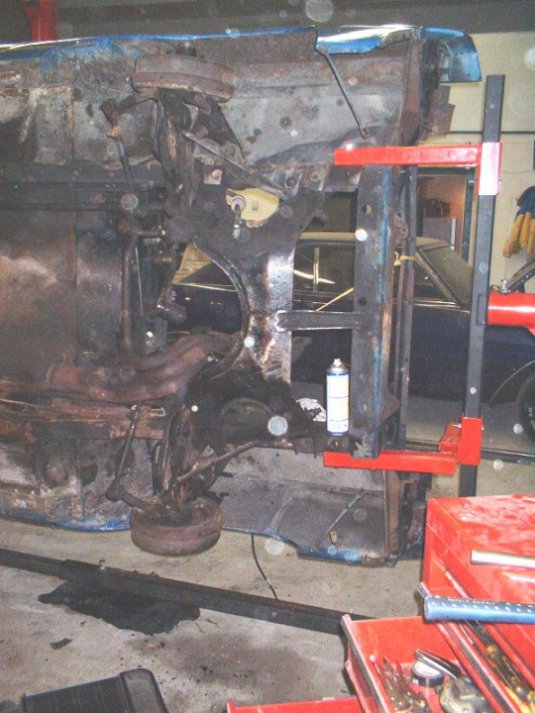
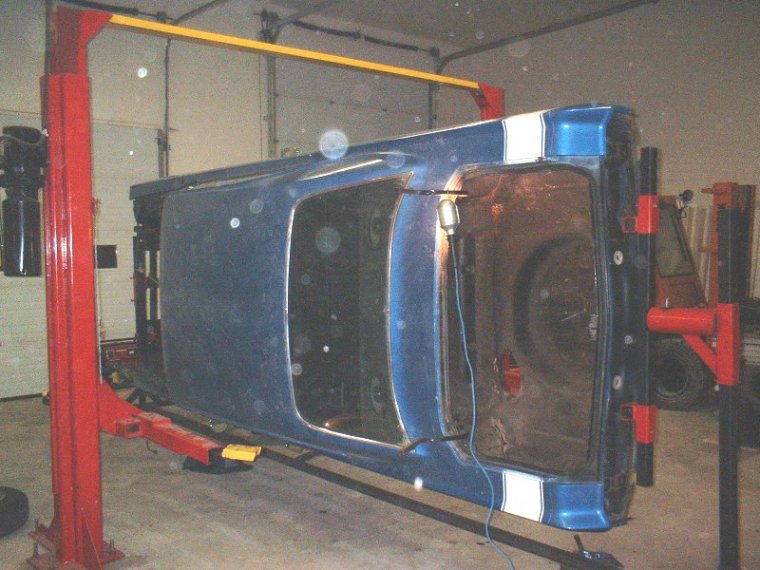

Fig. 12
Fig. 13
Fig. 14
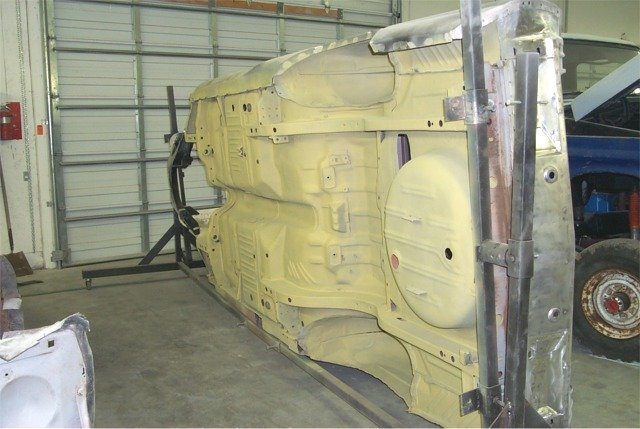
After the car is mounted and rotated, you can see how easy it is to work on it. You will certainly notice and be prepared to do more repairs when not having to lay on your back all the time. On the 5 inch casters, I am able to move the car around the shop with one hand and when not being worked on, it can be pushed tight against a wall and it only takes up about 4 1/2 feet of space.
Click here for complete free plans!
Return to the Index of Tech. articles